Here's the info from the class handout for this week...
You are welcome to play with the multiple exposure technique...but mainly I want you to focus on balancing flash with ambient light like we practiced in class.
Also try shooting a bracket (a range of exposures). See what the difference is when you under or over expose the background. (do this by adjusting your shutter speed while keeping the other settings constant)
Combining flash with ambient light indoors:
Use this technique to ensure proper lighting on your subject while maintaining the ambiance of the light in the room.
1. Set your camera to manual mode.
2. Set the camera to properly expose for the ambient light in the room.
3. Then manually turn on your flash while maintaining this exposure.
Using flash as “fill” outdoors:
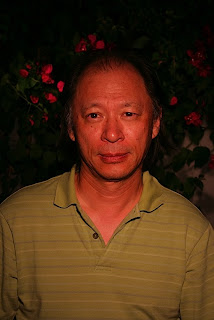
Even when there is enough light outdoors to make a proper exposure, flash can be used to fill in the shadows on your subject and to make them “pop off” the background. (Similar technique to shooting indoors described above)
1. Set your camera to manual mode.
2. Set the camera to properly exposure for the ambient light outside / on your subject.
3. Manually turn on your flash while maintaining this exposure.
Multiple flash images:
Most consumer digital cameras do not have a setting for multiple exposures in a single frame (like most manual film cameras do). This technique allows you to re-create the effect of a “double exposure” using multiple flashes during a long exposure. (some trial and error may be necessary to find proper exposure)
1. Use a tripod and frame up your shot.
2.Set your camera for an exposure anywhere between 10-30 seconds and use a small aperture, like 16 or 22.
3. Before shooting, make sure all the lights are off in the room so that only your flash affects the exposure.
4. Using an external flash, pop your flash several times over the course of the exposure, moving around the elements in the frame between each flash.
Wednesday, July 29, 2009
Tuesday, July 28, 2009
LIGHTING DEMO 3: FLASH
Today we will explore the possibilities of flash photography.Primarily we will focus on combining flash with ambient light to enhance the lighting on the subject while maintaining the ambiance of the natural light.
OUTDOOR:
Even when there is enough light outdoors to make a proper exposure, flash can be used to fill in the shadows on your subject and to make them “pop off” the background.
INDOOR:
Here is an example of how/why to mix flash with ambient light indoors:

Mixing flash with ambient light: Giving good light on the subject while maintaining the ambiance of light in the room.

Using only flash: allows for proper exposure, but the light is a bit flat and the flash drowns out the natural ambiance in the room.

This technique allows you to re-create the effect of "double exposure" by using multiple flashes during a long exposure.
Week 3: The Science of an Aesthetic
This week we will talk about two projects that use 8x10" view cameras and a strict aesthetic methodology to develop to enhance the power of their imagery.
Bernd and Hilla Becher:
http://www.masters-of-fine-art-photography.com/artphotogallery/photographers/bernd_and_hilla_becher_01.html
Nicholas Nixon:
http://www.zabriskiegallery.com/Nixon/TBS/nixonimages.htm#3
Assignment #2 Portraits
This is one way to make sure your model stays in the same place while shooting.... : )
His expression is probably in response to the crazy faces and noises I was making to get him to look toward the camera.
 Shot #2 Fill card
 Shot #3 Front Light
 Shot #4 Hair (or lack there of) Light
 Shot #5 No Background*
 * shot #5 had some light spill from the hairlight, so I took some liberties with Photoshop ; )
Monday, July 27, 2009
Assignment #2, from Carla
Subscribe to:
Comments (Atom)


